Creating a Diamond Necklace
For this part of the composition, you’ll use the diamond bitmap provided in the Zip file. The image is fairly large to give you a good resolution for printing. Use the Selector tool to scale the diamond down. The stone seems to lose a bit of its lustre when scaled down, so double-click it to display the Enhance Photos features on the Infobar, and turn the Brightness level up to about 10. You can also increase the sharpness to help increase that glittery look.
 To create the sections of the diamond necklace, you’ll need to create a brush. Select the diamond and then select the Freehand Brush tool from the drawing tools flyout on the Toolbar. Click the Create button on the Infobar and then in the dialogue that pops up give your brush a name; then click OK. See Figure 16.
You will need to edit the brush a little before you can use it, but first let’s create some swirls that will make up a lovely deco look of this necklace. Spiral swirls can be created fairly quickly completely manually to give the necklace a handcrafted look. Go back to the area on the pasteboard where you worked on the heart; you will be using the two crossing guidelines again.
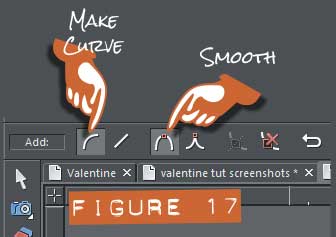 Select the shape tool and click the make curve button and the smooth join button, as shown in Figure 17.
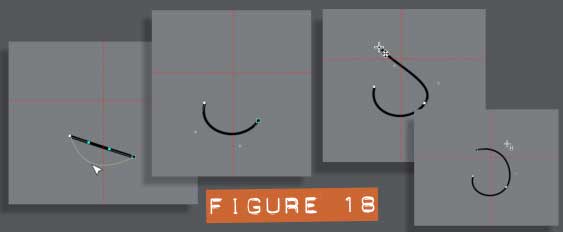
Click to make a line on a angle just beow the horizontal guideline then drag it down into a curve and use the bezier handles (like you did for the heart) to edit the curve and make it a litte more rounded. Click to set another node towards the top left just above the horizontal guide and the next segment will be curved, again use the control point handles to adjust the curve. These steps are illustrated in Figure 18.
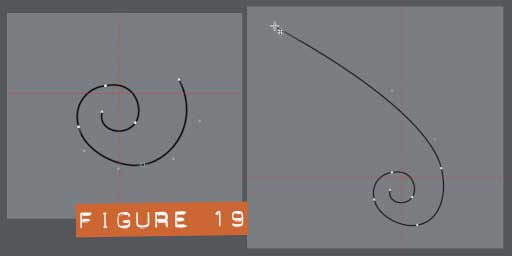
Repeat this clicking a little further out each time until you have a spiral similar to Figure 19 at left. Place the final node up towards the top left and give this one some extra length as shown is Figure 19.
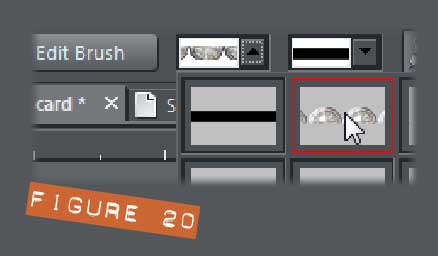
Now let’s apply the diamonds brush to the line. Select the Freehand and Brush tool again. Right next to the Edit brush button, click the drop down arrow next the box that displays the current brush; it will be a black line to indicate no brush selected. The drop down list appears and you can see all the currently loaded brushes. Click on your diamonds brush to apply it to the line, as shown in Figure 20.
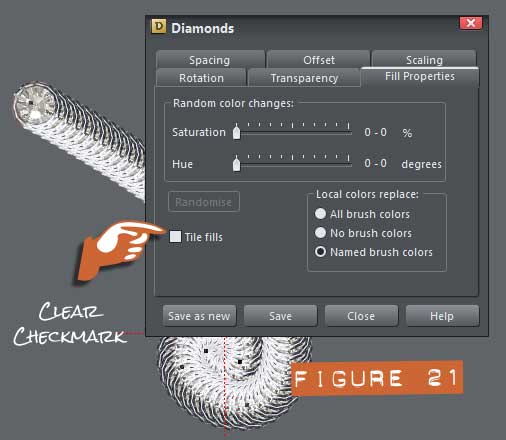
The brush is now applied to the stroke, but as you can see the result is a mess, confirming that need to edit the brush. Click the Edit brush button and select the fill properties tab on the edit brush dialogue and clear the checkmark from “Tile fills” and click apply. Instead of tiling your bitmap Xara will now repeat it along the path. Select the spacing tab and adjust the spacing, adjust the point size of the line as well, until you have something like Figure 21. Click Save to save your brush and then you can close the Edit Brush dialogue.
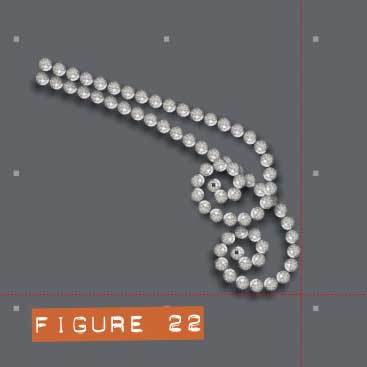 Add a wall shadow by clicking the Shadow tool, and then just drag on the shape on the page. Adjust the shadow transparency slider on the Infobar to about 50%. This is the first of the four sections that will make up the finished necklace. But you don’t have to do this all again 3 more times! Right-click and drag to create a copy of this piece and place it on top of the first and align it up, and to the right. Use the Shape tool and edit the curve to bring the two outer ends together and move both pieces so that they align with the vertical guideline as shown in Figure 22.
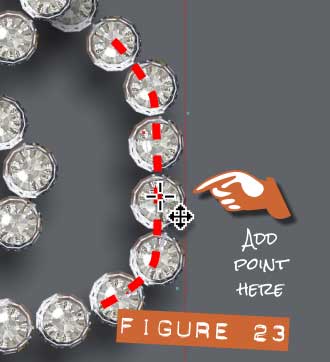 Zoom in and with the Shape tool, add a control point to the bottom line where there is a diamond touching the line; just click the line to add the point. Use the control point handles to edit the curve on either side of this node so that you have 3 diamonds vertically aligned and touching the line See Figure 23. At this point you can make some final adjustments to the curve of the strands at the outer ends to give them a nice look.
Once you are happy with your half a necklace, select both pieces and group them. Click the selected group to display the rotation handles, and (just as you did with the heart) snap the centre rotation point to the vertical guideline, copy (Ctrl+K) and flip the copy. Group the two halves and the necklace is done.
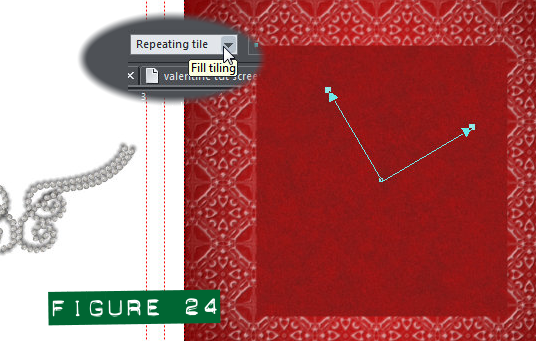
Draw a rectangle and place it on your card cover, open the bitmap gallery and with the rectangle still selected, select the red velvet bitmap and then click the Fill button at the top of the gallery to fill the rectangle. Select the fill tool and adjust the fill handles to reduce and rotate the fill. See Figure 24.
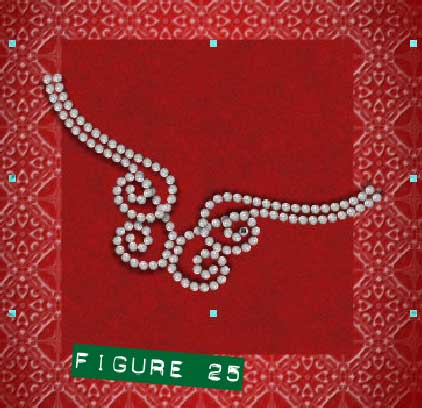
Place the necklace on top of the red velvet and rotate it and arrange it so that the ends a over the edges as shown in Figure 25. Select both the necklace and the red velvet and then press Q on your keyboard to apply a ClipView. Everything outside of the bottom-most shape is clipped to the bottom shape’s dimensions.