


Adding Texture via the Emboss Effect
Let’s use the embossing Live Effect now to create texture. First, select both rectangles and group them (Ctrl+G) Click the Live Effects tool (the plug icon) on the Toolbar, and click New on the Infobar. From the dropdown list, choose Stylization>Emboss.
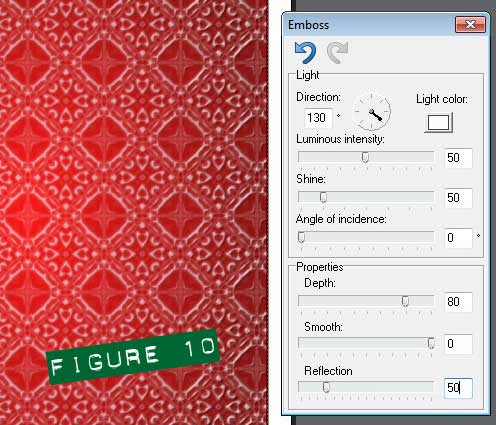 Start by adjusting the Light Direction. You can click-drag on the wheel icon to point the “hand” on the wheel in a south east direction. Alternatively, you can type 130 into the text box. Set the Shine to 50, the depth to 80 and the reflection to 50, as shown in Figure 10.
Draw another rectangle on top of the embossed group and give it a medium dark red fill.
Choose the Transparency tool (the wineglass icon) on the Toolbar, and give this rectangle an elliptical transparency; choose Elliptical from the drop-down liost at left on the Infobar. Notice that the default setting for this transparency is to have the centre opaque and the outside edges transparent. For this example, reverse this by clicking on one of the two outer transparency handles (either one will work) and set the slider on the Infobar to 0%. The rectangle is now fully opaque.
Select the centre transparency handle (where the two handles meet) and set the slider to 100%. Click-drag one of the outer transparency handles outward, to enlarge the transparency.
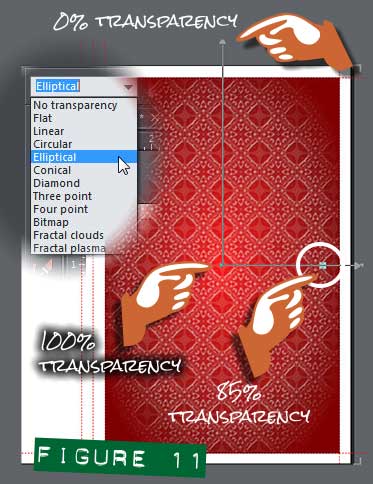 Double-click the horizontal transparency handle somewhere about the middle to add an intermediate transparency handle point. Select this point and set the transparency of this node to about 85% and then drag it outward so it is just inside the edge of the group. Check out Figure 11.


