


A Designer Pro X9, Tips and Tricks tutorial by Frances Proctor (“angelize” online)
Making a Creepy Interactive Halloween invitation
Let me set the mood for this spooktacular (sorry!) Seasonal tutorial: T’is All Hallows Eve and a cold wind kicks up, the veil between the living and the dead is at its thinnest allowing departed souls to return. A mysterious light flickers over the wet lands. Is it Stingy Jack?
Okay, Reality Check Time, it’s 2013 and legends told by candle light and the belief that the dead come back on All Hallows Eve have been replaced by smiling pumpkins. Halloween has become the second biggest holiday in English-speaking countries (which in itself is terrifying), and you are planning to throw a Halloween party. This tutorial demonstrates how to use one of Xara’s new effects and presentation features to create a spooky, interactive online invitation.
You can view, if you dare, byah, ha HA!, a working prototype of the invitation.
Click the Download button to get the zip archive which contains a clouds background, xarabackground_clouds.xar. Additionally, you’ll need a photo of yourself or some other generous soul who will let you turn them into a creepy apparition! You’ll also want a spooky Halloween font; Needletheeth is available from Sinister Visions’ website, and is embeddable in a Xara website.
Building the Background
Open your Xara program; Designer Pro X9 is shown here, but Web Designer Premium 9 should work for these steps, too.
0pen a new presentation (File>New>Presentation 960px). You can see the presentation tools on the top right, they look like little bare feet and a pushpin. That hurts just thinking about it! See Figure 1

Press Ctrl+Alt+I (the shortcut for Import). In the Import File dialog box, navigate to to where you saved the xarabackground_clouds.xar file, select it and then click Open. Because of the file’s naming convention, the image is placed on the correct layer for this presentation. You can also drag the file icon into the Xara presentation window when the program isn’t maximized onscreen.
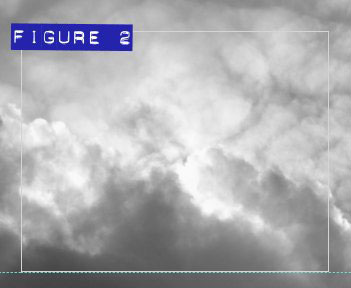
Now, the background looks stark and only a little dismal, not very Halloweenish, as you can see in Figure 2 . So you are going to edit the image using the Contone feature on the Color Editor (Ctrl+E displays it)
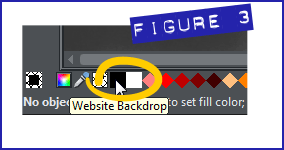
Notice that unlike the diamond-shaped swatches on the Color Line (indicating colors that are in the palette specific to this document) at bottom, the first two colours are square, indicating that these are Named Colors—colors that have been specifically given a title, that when the color is altered, all colors in the document that have this colour, or a tint or shade of the Named Color—instantly reflect the change. See Figure 3.
From the drop down list at the top of the Colour Editor, choose the named colour Website Backdrop, and then using the sliders and markers on the Color Editor, change it to very dark blue, or type 00010a in the Hex value box (the “#” field). Refer to Figure 4, because text alone here isn’t very descriptive!
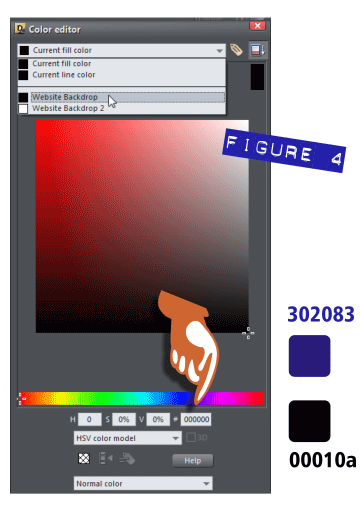
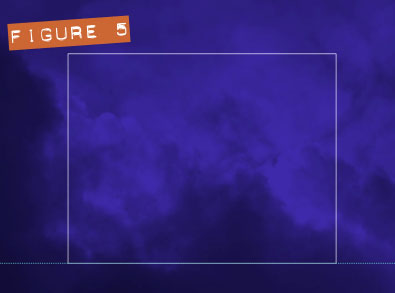
Repeat step 6 with the Website Backdrop 2 colour. Change it to # 302083 Now the stage is set for a positively frightful party invitation. See Figure 5.
Page Layout and Scaring up Some Text
This invitation will eventually consist of two pages, and a few presentation steps—events on your webpage that are triggered by interaction from the viewer, such as clicking a button. Let’s take this new feature out for a trip down a narrow, dimly lit foreboding road…
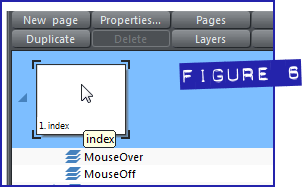
Open the Page & Layer gallery. At the top, with the Index thumbnail highlighted (click it to highlight it), click Duplicate. See Figure 6. You now have two pages— one named index and one named index – copy. The index-copy page title is highlighted and thus ready for editing (renaming). Change the name to page two.
Your first page should remain as index; don’t change its name. The index page will is the entry to the main invite: think of it as kind of like an envelope.
In the Page & LayerGallery, click the Index thumbnail’s expand triangle and set the current layer to MouseOff, because as you’ll see, the other layers are locked or hidden.
Click with the Text tool and type “You are invited…” in a creepy Halloween font of your choice. If you’re using Needleteeth, 80 points or so is a good height.
Make the text white.
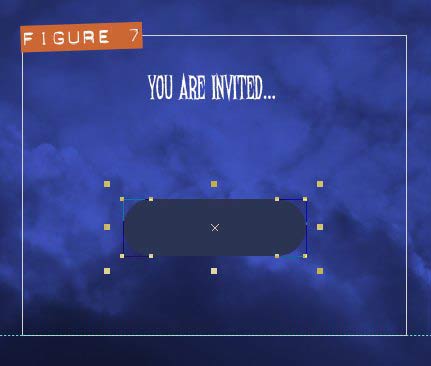
Create a rounded rectangle, about 450 pixels wide and 150 pixels high, and give it the new Website Backdrop 2 colour; see Figure 7. With the rectangle still selected, choose the Transparency tool (the little wine glass icon on the Toolbox, it’s probably red wine) and set a flat transparency of 40% on the Infobar, then drag the Feathering slider on the Infobar all the way to the right, to 50 pixels.
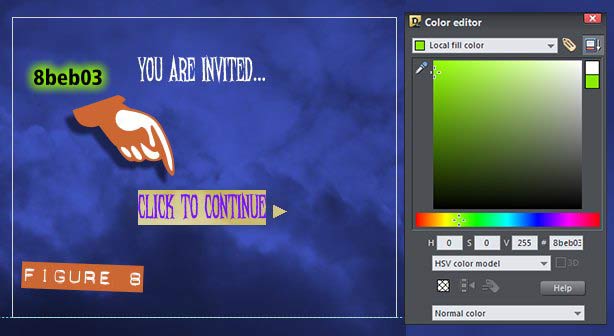
With the Text tool, click and type to give the button a label; “Click to Contiue” seems self-explanatory. Use the same creepy font for the text, place it inside the faint button, but now open the Colour Editor and with the text still selected, make it #8beb03 (an eeire glowing green), as shown in Figure 8.
You will be using this green colour again so you want to name it, to tag it for future modifications and to have it appear on the Color Line. Click the little name tag icon on the Colour Editor. Doing this opens the New named colour box, give your new colour a suitable name like ghoulish green or what ever strikes your fancy, then click Create.
Group the text and the button background.
Right-click with the Selector tool over the grouped text and button; choose Web Properties from the context menu.
Select the Links tab. Click the Link to button, and then in the drop-down list choose Page: page 2.
At the bottom section of the Links tab, there’s Link transition. From the Transition Effect drop-down list, Choose Fade. When the web page is online, and a visitor clicks the button, page two will fade in. Keep the Speed at its default. Faster is sometimes better than slower with effects; you really can’t know what the average speed of everyone’s Internet connection is! Click Apply and then click OK.
Do Drop In: Making the Invitation
You are ready to start working on the main invitation. If you aren’t using multiple page view, right-click on an area in the drawing window that has no shapes (or you’ll accidentally select a shape). Choose Multiple page view from the context menu. Let’s get cracking; the Witching Hour is growing near!
First, add a title to this page, to tell your recipient what this is all about. Choose a font that contrasts in style with your creepy font. You can see a Google font called Princess Sofia in these figures. Make sure on the Page & Layers Gallery that your current layer is not hidden or locked. With this (or a similar) font, type the first part of the title “you are invited to…” If you use the Princess Sophia font, 48 points is a good size, positioned at the top of the page. Give the text a cyan color.
Type “Halloween Party” below the first line, using your creepy font you used earlier. Needleteeth, if you downloaded and installed it, comes in different styles, but in general, one screen inch (about 72 points) is a good size for this phrase. If you are using different fonts, the sizes are bound to vary, howsever, the invitation phrase whould be a little larger than half the size of the creepy Halloween phrase. Give the Halloween Party text the Website Backdrop 2 colour.
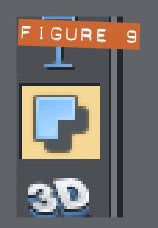
With the Halloween Party text still selected, choose the Shadow tool from the Toolbar. Figure 9 shows the tool icon: it sort of looks like Pac-Man, rendered by Picasso during his Cubist years.
Click the Glow shadow button on the Infobar. Zoom in for this next move: with the cursor, click on the glow effect, but not the text. The status line will tell you “1 shadow on layer…”
Change the shadow from the default red to the ghoulish green colour you named earlier.
Back up on the Infobar, for this Glow-style shadow, set the blur to about 33px and the Transparency to about 27% This gives the effect of backlighting a dark shape against a dark background, a dramatic treatment you see in motion picture titles of the sci-fi variety all the time.
I Ain’t Afraid of no Ghosts
Next, you are going to draw a simple ghost. This ghost will be used for more than one purpose, so you are going to keep the main body of this otherworldly creature and the arms as separate parts.
Start with a white ellipse; use the (doh!) Ellipse tool, and drag down so the ellipse is taller than it is wide.
On the Arrange menu, choose “Convert to editable shapes” from the list. The shortcut is Ctrl+Shift+S, and it’s one worth remembering in your daily work.
Choose the Shape tool (the Shape Editor in previous versions), and then click on the bottom control point. Pull this node downward, stretching the bottom of the ellipse.
With the control point still selected, click+drag the left control handle. Pull it inward and upward to create a curved tail-like shape, and feel free to peek ahead at Figure 10!
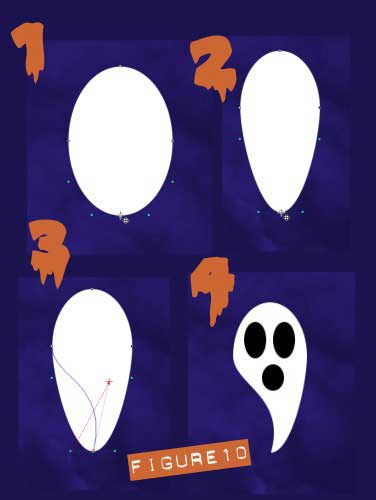
Add 3 black ellipses for the eyes and mouth and then select all three and press Ctrl+G (Arrange>Group).
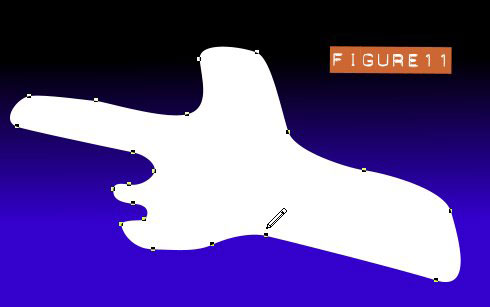
Choose the Freehand tool ( the pencil icon), and draw a ghostly arm shape, with a pointing digit; see Figure 11. Make sure the shape closes and fills. It should fill with white, because by default, new shapes inheret the previously selected or drawn shape’s properties. But if it doesn’t, make it white.
Before getting into the presentation steps, you need to create some buttons so your recipients can navigate through them.
Position the left-pointing arm appropriately next ot the body, and then select both the ghost body and the arm, and then right-click+drag a copy of the two items.
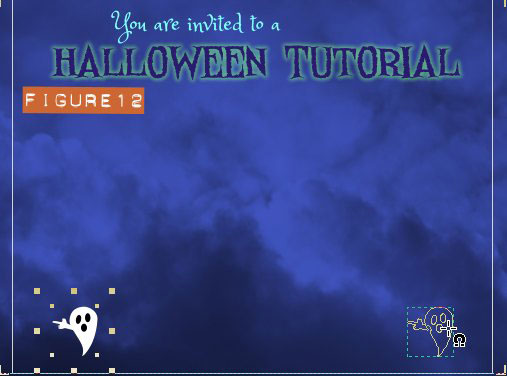
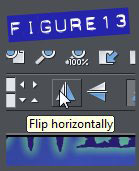
Resize the copies down so that the body is perhaps 100 pixels high. and then horizontally flip the arm so it’s pointing to the right. Position the arm relative to the body appropriately. See Figure 12; you can see the flip button on the Infobar in Figure 13.
Right-click and drag and then drop a copy of the ghoulish green glowing halloween party text; drop it near the left-pointing ghost.
With the Text tool, highlight the text and change it to read “Previous” Resize it down and place it just so it overlaps the bottom of the ghost, and group the ghost, arm and text, as shown in Figure 14.

Right-click over the group and then choose Web properties. Click the Link to button and then choose <Previous page> from the drop-down list. Click apply and then click OK. Now your recipients have a way to go back and view the entry page if they get too scared to continue.
Create a “Next” button using the right-pointing ghost and a copy of the scaled-down “Previous” text.
With this new button’s elements grouped, right-click to get Web properties, click the Link to: button and then from the drop-down list, choose <Next presentation step>. Click Apply and then click OK, and don’t worry that you don’t have a next presentation step yet. Instead of worrying, press Ctrl+S to save your document—you’ve done some excellent work and it would be a shame for it to vanish like Casper.
13 o’clock and it’s Presentation Time!
You have the basic mouse off layer done. Now, you are going to start creating the presentation steps. This is a new, easy to use, and exciting feature in version 9.
Select the NEXT and PREVIOUS buttons with the Selector tool and then hit (or press!) Ctrl+K to clone them.
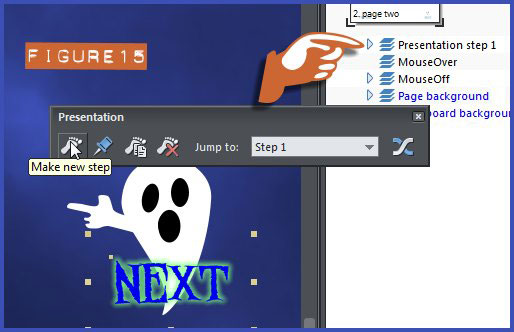
With these clones (copies, duplicates) selected, click the foot icon on the Presentation toolbar: it should be the only button on that bar that’s currently active (it’s lit up). A new layer is created called Presentation step 1 and the rest of the presentation tools have become active, as shown in Figure 15.
This step will begin with the ghostly apparition. Import the photo you are going to use as your Haunting Host of the party. Two sets of directions are provided for this next step, one for Designer Pro 9 and one for older versions and Web Designer premium 32 bit, because the Live Effects are different in the 32x version compared to Web Designer Pro’s 64x version.
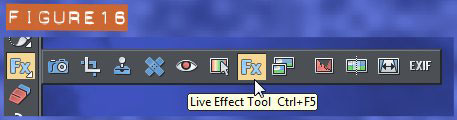
In Xara Designer Pro 9: Click the new FX button on the Photo tools flyout bar; see Figure 16. Click the New button on the Infobar, and then and click Colour Mix. Your photo has now had the red, green, and blue colour channels mixed up. The default setting gives your photo the appearance of a negative image and this is desired in this website.
In Web Designer 9 32bit and older: Select the new FX button on the photo tools flyout bar. In older versions, the icon is a plug and it’s on the toolbar, and not a tool flyout flyout. Click New in the Infobar, go down to Colour filters, and select Negative. This now gives you a negative image quite similar to the Colour Mix filter.
Now that you have converted your photo into a negative image, use either the Eraser tool (available only in newer Xara versions) and erase around the edges of the photo. If you don’t have the Eraser tool, use the Freehand tool to draw a blobby shape over the photo, then select both drawing and photo and then press Ctrl+3 to (Arrange>Combine Shapes>) Intersect Shapes.
With your photo still selected, give it a large amount of Feathering. Choose the Transparency tool from the Toolbar, and give the photo a flat transparency of about 70%.
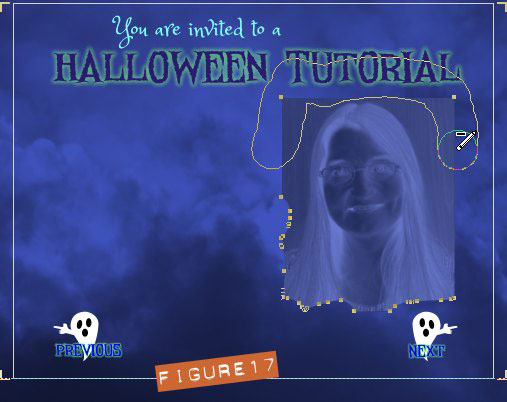
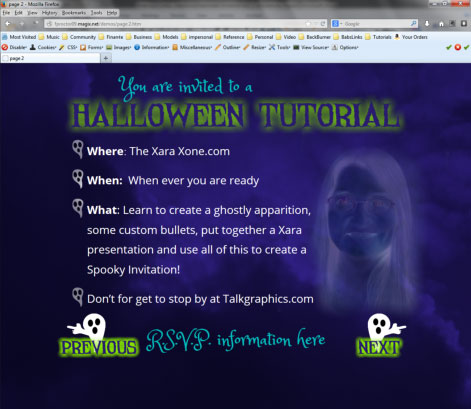
Place your ghostly apparition to the right of the page (as shown in Figure 17). You need room at the left of the page for a bulleted list of the wheres and whens, so scale the photo down a little if necessary.
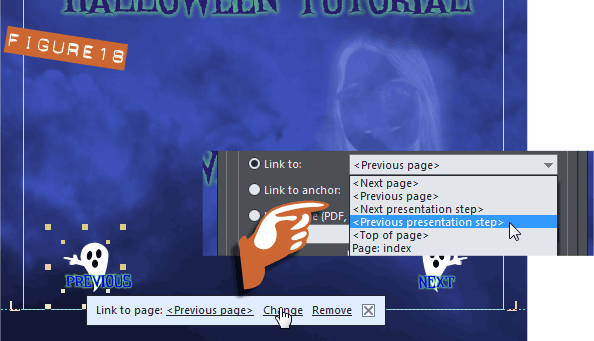
Select the Previous button. When you see the tooltip, click Change (see Figure 18). Change previous page to <Previous presentation step>. Click Apply and then click OK. You’re finished the first presentation step.
More Stepping Around your Invitation
You’ll get the hang of this new step feature very quickly. In fact, it’s time to step up and create your next invitation step:
Select the Next and Previous buttons and clone them(press Ctrl+K) click the foot to create a new step.
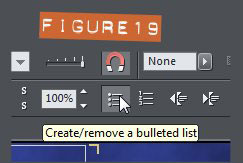
Choose the Text tool and for the list use a clean sans serif font (Open Sans is good) Click+drag to create a text area, and then click the create/remove bulleted list button on the Infobar (See Figure 19).
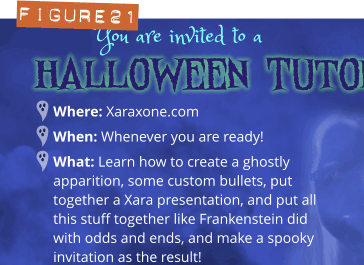
Type out your party information such as where: give the location and address of the the party; hit Enter (a new bullet is created) and go on to when the party is, and so on.
These round bullets are functional, but let’s get ambitious replace them with a little ghost. Fetch the ghost you created for the buttons; all you need for this is the body—skip the pointing arm shape.
Scale the ghost down so it’s just a little taller than your text.
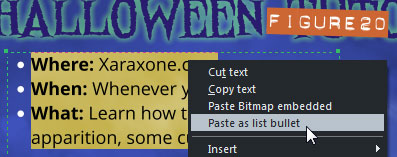
Use the keyboard shortcut Ctrl+X to cut the ghost to the clipboard. With the Text tool place a cursor in the list text and right click.
From the context menu, select Paste as list bullet; see Figure 20. And auto-magically (!) Xara replaces the bullets with ghosts! See Figure 21.
Raise the slab, Egor: the Thunderstorm is Coming!
Let’s put some final touches and a few last-minute items on the presentation before launching it!
With the bulleted list still selected, click to create a new step and then click the Transitions button on the end of the Presentations tool bar; see Figure 22.

Layer properties appears after you click the Transitions button, and you will see a drop-down list for Transition effect, on the Pop-up settings tab. Chose “Slide in from right”. Click Apply and then Click OK. Now when the presentation is exported each item in your bulleted list will be a single step that will slide in from the right when the guest clicks the Next button.
Finally, select the Next and Previous buttons, clone them, again, and then click the foot icon to create a new presentation step.
Using the same font you used to create the cyan text, add some R.S.V.P. details, and the presentation is done! Click the preview whole web document button (or just press F5) and make sure everything looks the way you want.
Getting the Invitations Out
You are now ready to publish!
Choose Share from the main menu and then click Publish website. The sign- in to Magix online box comes up. If you don’t have a website host you can sign up for Magix online for free. if you do have your own hosting you can click the “publish to alternative web host”, and then fill in your hosting details there. See Figure 23.
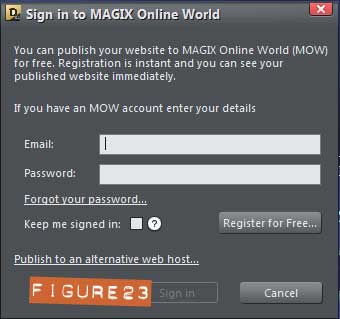
To publish to Magix online, once you have registered for your free account, fill the e-mail address you used and your password. Keep in mind your password is case sensitive: “OmG1982” is a different password than “OMG1982”.
Click Sign in and another box comes up showing your Magix Online site address, and provides the option to set a subfolder to upload to. If you wish to create a new subfolder on your site, click the control center button and it will take you to your Magix Online control center where you can manage your site and add subfolders.
Once you have filled out any subfolders you might want to upload to, click Publish and Xara will take a couple of minutes to upload your site/invitation. You’ll see the progress bars at top right.
Once the upload is finished, your URL (the link to your site) is displayed, as shown in Figure 24. You can send this link to your friends via e-mail.

Have a great party, and get your coach back to the mansion before midnight or you might get stuck inside a large fruit! Wikipedia says a pumpkin, even enchanted ones, are fruits, not vegetables.
Discuss this tutorial and show the work it inspired in the Xara Xone forum on TalkGraphics.com

(Angelize online), is the co-publisher of the weekly, Good Morning Sunshine! that has brought a smile to the faces of print and online subscribers for 14 years. She uses Xara products extensively in her work for her firm, SunWings Graphic Design. She loves to teach and share her love of Art though her YouTube channel, her contributions to The Xara Xone and her work on Xara’s TalkGraphics forum as a moderator. You can drop her a line through her website or better yet stop by the Xara Xone forum on Talkgraphics and chat with Angelize there.
The tutorial Making a Creepy Interactive Halloween Invitation including the artwork and the downloadable examples file are Copyright © 2013 Frances Proctor. All Rights Reserved.


