


Making the Valentine’s Day Card
Now you’ll use your card template to create your Valentines card. Start with the front cover, which is created on right side of page 1 so that it will be correctly oriented when the card is printed and folded.
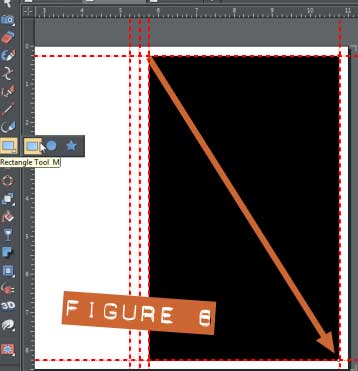 With the Rectangle tool, click-drag from the top left of the inner rectangle created by the guidelines on the right side of page 1 (the front cover) let the rectangle snap to the guidelines. See Figure 6.
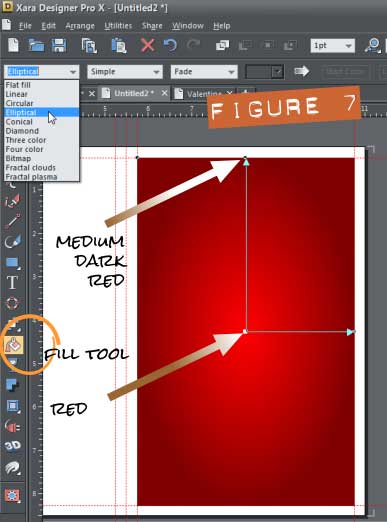 With the rectangle still selected, give the rectangle a medium dark red colour by simply clicking the medium dark red colour on the colourline. Choose the Fill tool. Change the Fill Type to Elliptical on the Infobar drop-down list (far left). Select the centre fill handle and then apply red by clicking the red colour on the colourline. See Figure 7.
Clone the rectangle by using the keyboard shortcut Ctrl+K. Doing this creates a copy aligned directly on top of the original. Select this top rectangle and then click white on the colourline. Open the Bitmap Gallery (pressing F11 is the shortcut); with the white clone selected, select patternmap.png, and then click the Transp button on the top of the gallery panel to apply the pattern bitmap to the rectangle as a transparency. You’re introducing a little black into the red gradient rectangle underneath the clone rectangle, to visually shade the gradient with the pattern.
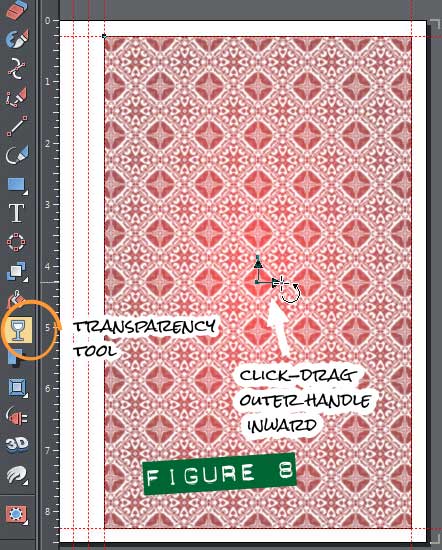 Choose the Transparency tool from the Toolbar. Click-drag the outer transparency handle inward to reduce the transparency, as shown in Figure 8.
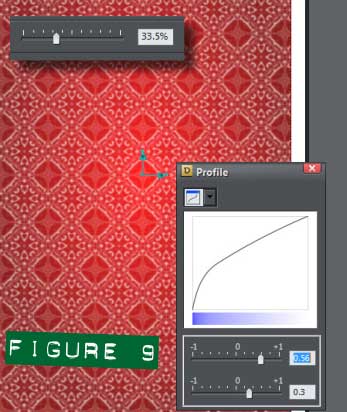 On the Infobar, click the arrow icon to open the profiles box and set the top slider to 0.56 and the bottom slider to -0.3; See Figure 9.. Doing this makes the pattern overlay rectangle a little more transparent in the deeper tones, and adds a little contrast. Now more of the red gradient background shows through.


