


Creating the Card’s Graphics
For this next part of the card creation, you’ll be working on the pasteboard alongside the page. Drag a vertical guideline from the ruler and place it somewhere between the ruler and the edge of your page. You want to give yourself a bit of room to work. Zoom in on the area where this new guideline crosses the horizontal one at the top of the page. 200% zoom works well.
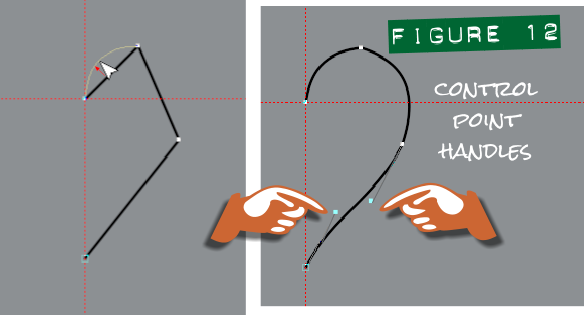
Let’s make some hearts to put at the corners of the card. Hearts are probably one of the easiest graphics to draw by hand, but getting both sides to have symmetrical curves isn’t that easy. So select the Shape tool on the Toolbar, and click to set the first node at the centre where the guidelines cross, and then click to set the next node on an angle above the horizontal guide. Click to set a third node on an outward angle below the guide and the fourth node on the line directly below the first. With the Shape tool and your line still selected, drag the segments out into curves. The curves can be further edited if you desire by using the control point handles that appear when the node is selected; See Figure 12.
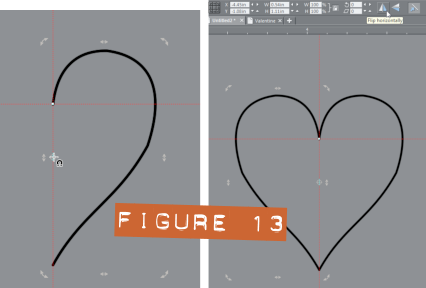 Once you are happy with your half a heart, clone it (Ctrl+K), and click the selected clone to display the rotation handles. Drag the centre rotation handle over until it snaps to the vertical guide. On the info bar click the horizontal flip button; See Figure 13.
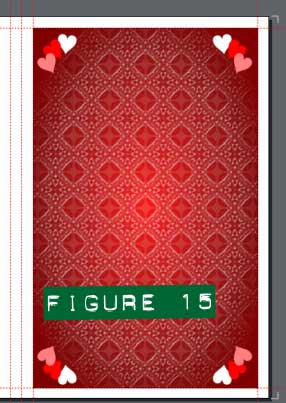 Once you’ve filled your heart with color (or with joy or compassion) Shift+click over the “No Color” swatch at the left of the Colour Line. Then “drop a copy” twice; with the right mouse button pressed, drag the heart shape, and then release the mouse button. Give your 3 hearts different colours of pink red and white, and arrange them in an eye-pleasing way to create a corner piece for the card. Select all 3 hearts and group them. Resize and arrange your corner piece on the textured back ground. Hold Ctrl and then right-click and drag a copy of the corner piece across to the opposite side; Ctrl constrains the direction of the copy so it should align horizontally to its original—you’ll see a faint blue line guiding the copy as you right-click and drag. Flip the new corner to mirror it using the Flip Horizontally button on the Infobar. Select both corner pieces and repeat the right click and drag process to create the bottom two corner pieces and then flip them vertically ( the button for this is right next to the horizontal flip button) You should now have something that looks like Figure 15.


