Wooden You Know It
In this section we are going to create some wood grain effects. One of the transparency types we will be using for this will be Opacity Masks so you will need to have a version of Xara that has Opacity Mask capabilities.
 We are going to start with a Fractal plasma fill similar to the water but this time we are using shades of brown and to begin we are going to be working with a rectangle. Set the start and end colours using the swatches I have in the example or experiment with mixing your own light and dark browns.
Skew the fill by holding Shift and dragging on the fill handles as shown. Clone the rectangle (Ctrl+K) and using the Transparency tool (F6) apply a Stained glass transparency.
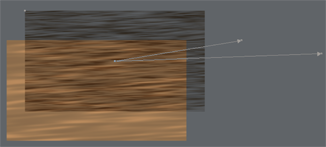 Set the transparency to Fractal plasma and skew the transparency. click anywhere along the horizontal transparency handle to activate the fractal resolution and scale controls. You can also adjust the fill on this clone to produce finer or coarser graining in your wood. I encourage you to experiment with this a bit, you will notice that by playing with the settings on the two layers it is possible to create many types of wood grain.
Once you are satisfied with your wood grain group the two layers. There is still something missing to make this wood a bit more realistic. If you look at a piece of wood you will notice that it has those darker concentric rings or depending on how it has been cut semi concentric.
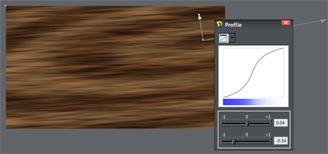 Clone the wood grain group and give it a stained glass transparency. I’m going to show you two different methods to create the final layer to your wood. The first is a simple concentric ring effect. For this effect set the stained glass transparency to elliptical and make it repeating. Play around with skewing the transparency and moving the centre towards a corner of the rectangle. You can also adjust the profile sliders (click the arrow on the info bar) to create harder or softer rings.
The second method creates a different look, however it uses opacity masks and will require a version of Xara capable of creating them (Designer Pro 6 & 7 and Photo & Graphic Designer 6 & 7)
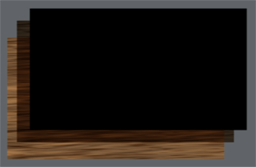 Starting with the wood grain group and the clone with stained glass transparency, draw a black rectangle over top of them. The illustration shows the layers you should have (stacked on top of each other).
 Select the freehand tool and draw white lines on top of the black rectangle, If you are using a pen and tablet you can use a thick line with the pressure recording enabled or you can use a pressure profile. In my example just to show how it looks I used the ellipse profile. You can mix up the line weights to make some thicker.
You want to keep in mind while doing this that the black areas will be 100% transparent and the white will not have any added transparency at all.
Once you are happy with your black and white wood grain, select the black rectangle and all the white lines you have drawn. I find the Page and Layer Gallery makes this really simple. Just select the first line in the Gallery then hold shift and click the black rectangle.
Cut (ctrl +x) them all to the clipboard. You should only have the two original wood grain layers left.
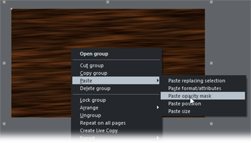 Right click the top layer and select paste>paste opacity mask.
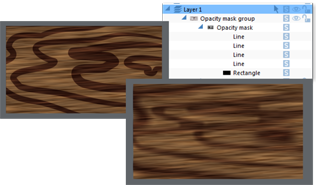 Expand the opacity mask group in the page and layer gallery. From here you can easily select the individual lines to adjust feathering and more. Try varying the feathering and the line colour (remember a lighter line colour means more transparency a darker line colour means more!) you can also play around with stretching and skewing your lines to produce a more natural wood grain effect.
No matter which method you use your wood grain can be grouped and molded and/or clipped to create all manner of wooden objects.


