


Watery Ways
 Using a Fractal plasma fill to simulate water is probably a very familiar task to some of the more experienced users, but we are going to take this a step further and use layers with different types of transparencies and create a body of water that also appears to have some depth.
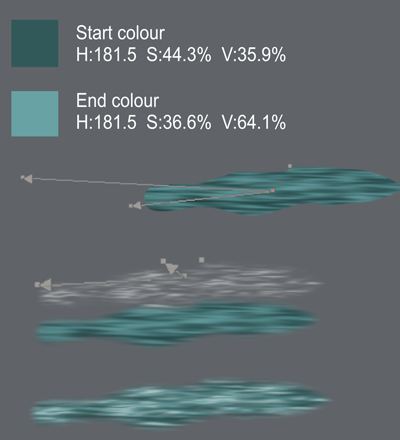
Start by creating an elongated blobby shape and give this shape a Fractal plasma fill with the start and end colours as indicated. Adjust the fill handles to stretch the fill. Give the shape some feathering, about 10pix This looks sort of like water but let’s create some highlights. Clone (Ctrl+K) the shape and with the clone still selected select the transparency tool. Set the transparency shape to Fractal plasma and the type to lighten. Click the arrow on the Info Bar and set the bottom profile slider to -0.64. Adjust the transparency handles and pull the center up and to the left just a bit.
 This will be the patch of water that you can use to build up a larger body of water. In the example below I started with larger patches in the front flipping and cloning them and working backwords getting smaller as you get further away. You can also make clones with a stained glass transparency and layer these clones in with the others to add a bit of variance to the colours and it also adds an illusion of lower areas.
 Here I have used Clip View to add the water to a cloudy sky scene, and by using the cloud brush at a small point size (about 8pt) I added a bit of foam to my waves.
Depending on the size of your drawing and the amount of water you may find that it is beneficial to make a bitmap copy (Crtl+Shift+C) of the water and then clip that with your background.


