Creating and Filling an Extrusion
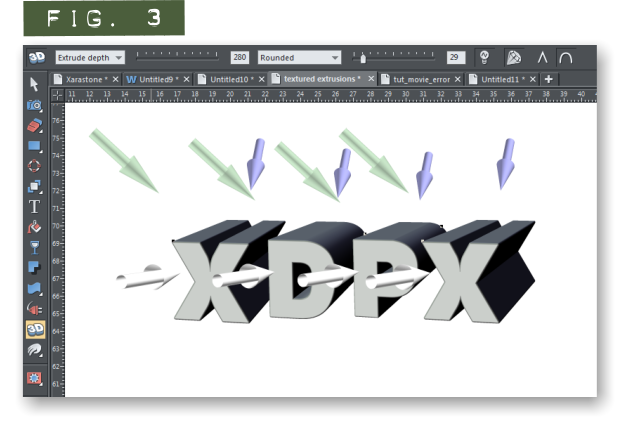
You need an extrusion to work with and this can be anything you like; but you should color the object to be extruded with 50% gray because the colour will come from the texture. In this tutorial I’m going to extrude and texture some text. If you use text you should use a bold blocky font, and Convert to Editable Shapes (Ctrl+Shift+S) and use the Ungroup command (Ctrl+U) twice. Extrude your object or objects and from the InfoBar use the Gloss/Matt icon to disable the glossiness and adjust the lights to get a high contrast. See Figure 3.

Figure 3. High contrast extrusions.
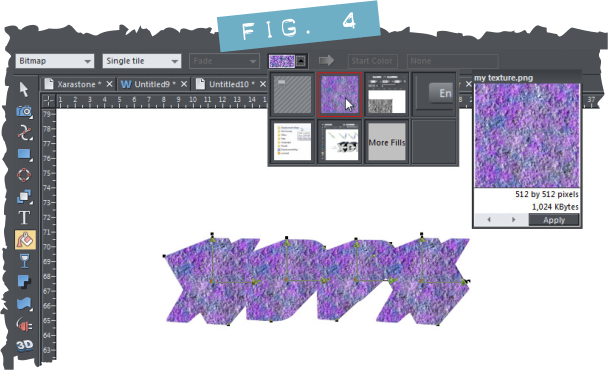
Clone your extrusions (Ctrl+K) and Convert to Editable Shapes (Ctrl+Shift+S). You now have your extrusions and a bitmap filled shape the exact shape of your extrusions. Select and create a copy of these shapes and set them aside on the pasteboard. You’ll use them later to create shadows. Select the original shapes on the page and click the Fill tool. If you have more than one shape the Fill tool may show “many”; Choose Bitmap from the Fill Type drop down menu and choose Single Tile from the Fill tiling drop down menu on the InfoBar. Use the Bitmap name drop down menu in the middle of the InfoBar to choose the purple_agate texture from the bitmaps in the Bitmap Gallery. You now should have something like the image in Figure 4 on your screen.

Figure 4. change bitmap fill.
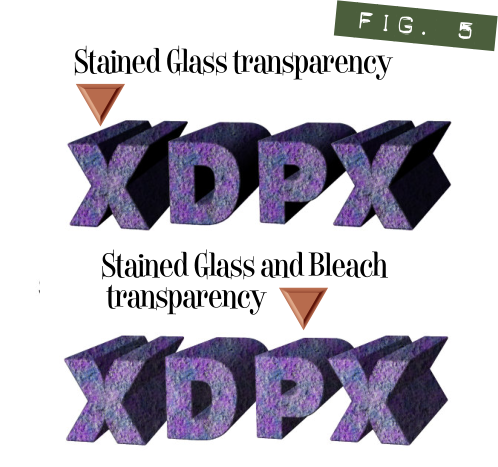
With all the textures shapes selected, choose the Transparency tool and from the InfoBar choose Flat from the Transparency shape drop down and choose Stained glass from the Transparency type drop down menu. You will be able to see the shading from the extrusions underneath; however using just Stained glass transparency doesn’t produce the necessary effect because the texture is lost on the shaded areas. To fix this, make sure all the texture shapes are still selected and Clone them (Ctrl+K) and then change the Transparency type to Bleach. Use the Transparency slider on the InfoBar to dial this back a bit; around 75% is good. You should now have something that looks like Figure 5.

Figure 5. Transparency layers.


