


A Tips and Tricks Tutorial by Gary Bouton (Gare online)
Using Text as A Shape
Xara Xone June 2012 Tips ‘n’ tricks filesOne of the cooler things you can do with text in Xara is you can distort it, specifically, using the Mould Tool. When typing and editing with the Text Tool, text is just text, as you’d enter your prose in any program. However, Xara’s other tools treat text as a collection of vector shapes that can be scaled, rotated, skewed and can sometimes make the message hard to read, but occasionally you’ll want to use text as a design element in a composition, with the content of the text as a secondary consideration in a design.
This month’s tutorial explores the Mould tool used in combination with text. The Mould Tool operates in two different, mutually exclusive modes: Envelope (text and objects conform to a preset shape you can then modify) and Perspective (creates the appearance of reading a sign or a logo around the corner of a building). What you’ll learn to do is take a photograph of an opened book—you can buy a journal that has blank pages for 2 or three dollars at a crafts store—and add text, and a graphic. By learning this technique, you’ll be able to create a dozen compositions, all featuring different book interior layouts.
Let’s begin with a practice run, to get a feel for the Mould tool.
Type (or paste) some column text in a new Xara document, and then experiment with the text as follows:
- With the text selected using the Selector tool (not the Text Tool), choose the Mould Tool. This tool edits the mould; you need to first choose a style from the lnfobar to continue.
- Click the Default Perspective button. This gives you freeform control over the shape of the perspective.
- Drag any of the corner handles away, or toward the text to create a perspective effect. As the perspective becomes increasingly severe, you’ll see one or two circles with a crosshair in the center. These are called vanishing points (or perspective points). These are the points at which if this page were actually 3D, that the contents of the mould would vanish into the horizon. You can drag these vanishing point handles instead of working with the bounding box handles. (See Figure 1).

- To remove a perspective, with the Mould tool chosen, click the Remove button.
- To copy a perspective and then apply it to a different shape, with the Mould Tool and the object selected, click the Copy button to the right of the Remove button (the pages icon). Then, select a new object, click the Mould Tool on the Toolbar, and then click the Paste Perspective button, the rightmost (not the Paste Envelope) clipboard icon on the Infobar.
TIP: You can edit a perspective mould at any time using the Shape Editor or the Selector Tools.
NOTE: Bitmaps will accept the Perspective mode of the Mould Tool, but creating an Envelope isn’t possible due to the rectangular nature of pixels in bitmaps.
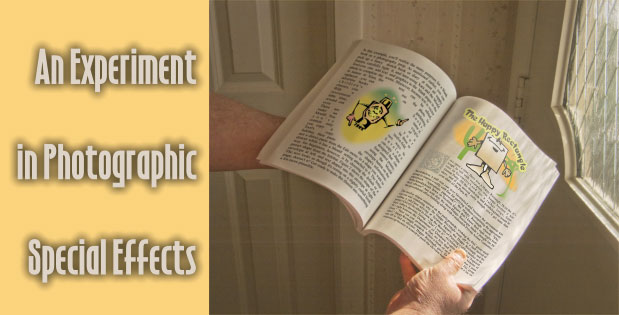
An Experiment in Photographic Special Effects
Quite often, today’s Hollywood acting talent—both of them—are asked to react or interact with thin air; a special effects house put in a creature or flying saucer in post production to make the scene more exciting. Similarly, prototyping is used in many fields of business, including publishing, to produce advertisements before a product rolls off the production line. The photography, therefore is done before all the elements of the photo are available.
In this example, you’ll realize the many purposes for a blank book as a photography prop. As mentioned earlier, you can pick up a fancy sketch book or diary at most art supply houses, carefully light it, and later—using Xara and the Mould Tool—you can add text and graphics to the blank pages in the photo to complete the scene. Moreover, because text is vector in nature in Xara, the text can be edited, replaced…you can use the photo to advertise books on gardening, children’s books, classics, you name it. With a single investment of a little time, your reward can be three or even twelve-fold.
There are two ways to make an Envelope Mould. You can copy a shape you’ve designed that can contain only four control points; you copy it using the Mould Tool’s copy envelope button on the Infobar, then paste the shape’s information—not a direct paste from the Edit menu— to a shape you want to distort while it has a Mould setting attached to it. The better way for beginners, however, is by choosing the default or a preset shape from the Infobar. Figure 2 shows the shape of the envelope at left, and text shaped into this envelope at right. The text looks as though it’s resting on a slightly curled book page, doesn’t it? Get ready to make this illusion into something a lot more plausible.

Download Xara-Xone-June-2012-TT-files now, extract Page layout.xar and load it into Xara. The hard work of page composition has been done for you; the photo is on a locked layer and all you really have to do is enjoy the experience of playing with the Mould envelope after you apply it to the text.
NOTE: The text in the Page Layout.xar file is editable. You can rewrite the story if you like and hurt the author’s feelings, but better still you can apply a different typeface to the story. Times New Roman was used because it’s a system font all Windows users have installed, but as a children’s story illumination, it’s pathetic. You can re-cast the text without ungrouping the page layout. Just insert your Text Tool cursor into the text, then press Ctrl+A to highlight all the text. Then Live Preview from your collection of typefaces shown in the drop-down list.
Here’s how to make the off-camera gentleman looks as though he’s actually enjoying the text in a book:
- With the Selector Tool, move the page layout (it’s the only unlocked item on the page) so it’s roughly positioned above the blank right-facing page above the photo. If necessary (you might have changed the text as suggested earlier, changing the size of the grouped objects), scale the grouped objects.
- Choose the Mould Tool and then click of the page layout to select it.
- The Infobar now displays Envelope and Perspective presets. Click the far left Default Envelope button; you’ll see a bounding box now around the group with control points at the four corners.
- Begin with one point such as the upper left. Drag it so it’s just a little inside the underlying blank page’s upper left corner (books need margins).
- Dragging the control point produces two control handles; drag the top right one so the top bounding box curves to match the curve of the top of the page in the photograph. Don’t drag it more than half the distance to the upper right control point; you’ll distort the page unrealistically and the upper right control point will help successfully mould the top edge of the group of vectors.
- Repeat step 5 with the top right control point.
- Move on to the bottom left and then the bottom right control points and their handles. You’ll want to work back and forth between control handles and points; as you adjust one, it has an impact on its neighboring handles. All it takes is a few moments of patience.
Figure 3 shows the page layout at left and the near-completed project at right. Because you’re working entirely with vectors (text is vector-based, too), even though you’ve twisted the page to match the angle and perspective in the photo, the page will be legible when printed. Vectors always retain edge crispness and vector data is sent to printers at the highest resolution the printer is capable of outputting. The text is only about 7 points, and you’d certainly notice a blurriness if this art was rendered to bitmap format.


