


A Tips and Trick Guest Tutorial by Frances Proctor (Angleize online)
Everything New is Old Again!
Xara Xone May 2012 Tips ‘n’ tricks filesRestoring old photos, repairing scratches, removing noise and making them look newer is a common task. In this tutorial however, I am going to do the opposite. I am going to show you how to take a brand new digital photo and age it and distress it and make it look like an antique card mounted photo.
I have made available for download a file containing a small colour pallet of sepia tones that I sampled from scans of real antique photos and a seamless tiling image that will be used to distress the photo. I am also using a free font called Mayflower Antique by Dieter Steffmanthat you may want to download.
Before you begin you will need to unzip the downloadable resources and save the .pal file and the wrinkles image to your computer. Once you open your new page in Xara browse to where these files are and drag and drop them into your document. Make sure you drop the .aco file somewhere away from the colourline. The sepia tone colours will now appear on your colourline. These are named colours named as RGB percentages. You can pull the wrinkles image off to the pasteboard out of the way.

Figure 1

Figure 2
Take a look at your subject’s clothing, as I said I’m not going for historical accuracy here, but you don’t want the clothing to look too modern either. I cloned the photo and cropped out the sweater and the locket. I used the shape tool to create a shape to raise the neckline and sandwiched it between the photo and the sweater. I used a bit map transparency to make the shape look lacy. (the bitmap I used for this is the lacy tile from the seamless pack of bitmap tiles in the TG Clipart Gallery) See Figure 2.
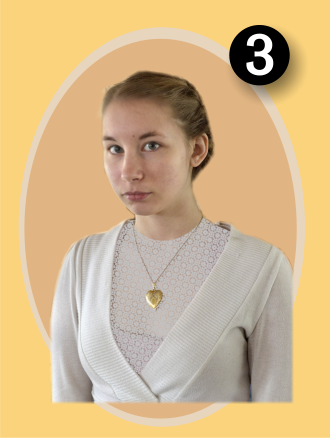
Figure 3
Draw an ellipse that is a bit bigger than the photo and give it the RGB 91 84 74 sepia tone from the sepia tones colours. Clone the ellipse and give this clone the RGB 88 71 51 sepia tone.
Hold down shift and re-size the clone so it is slightly smaller than the original ellipse.
Place the photo over the ellipses so that the bottom of the photo is slightly overlapping them. See Figure 3.
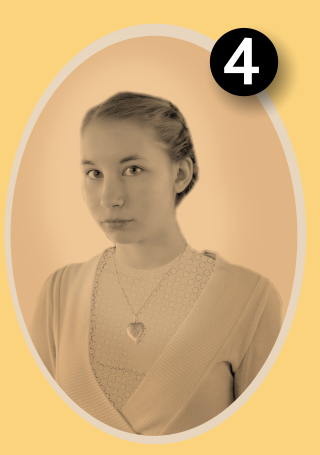
Figure 4
Select the photo and the smaller ellipse, tap Q on your keyboard to apply a clipview. See Figure 4.
The photo now has a lovely old time sepia tone but we aren’t done antiquing it yet!
With the photo still selected click the plug ins icon and select distortion filter > add noise.
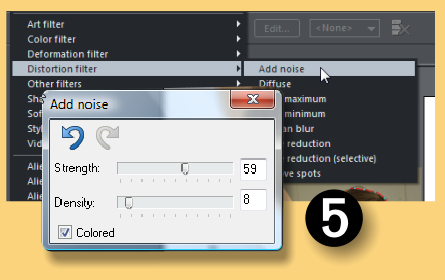
Figure 5

Figure 6
Select all and group.
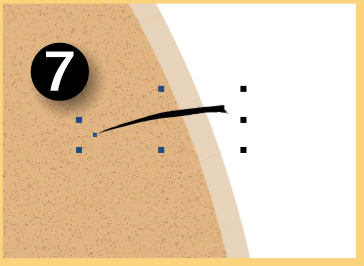
Figure 7
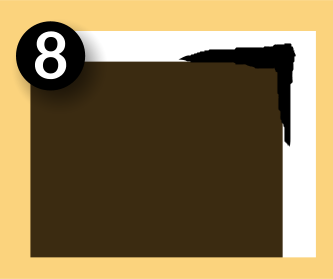
Figure 8
Your photo should now have the appearance of scratches and a small crack at the edge as if it has been stored away for many years in the bottom of a box of odds and ends!
You can set the photo aside for now, while you prepare the mounting card.
Draw a rectangle a little bit wider than your photo group and tall enough to accommodate the photo group and a label at the bottom.
Give the rectangle the RGB 23 17 7 colour from the sepia tones. Distress the corners in the same way that you created the crack but don’t lop off too much. See Figure 8.
Once you have all four corners roughed up a bit clone the rectangle shape and give it the RGB 56 49 28 colour from the sepia tones.
Apply a fractal plasma transparency to the clone and click anywhere on the clone away from the handles and the fractal resolution and fractal scale fields will be come active.
Set the resolution to 300dpi and set the scale to 100%
Click the profile arrow and set the profile sliders as follows: Top – 0.88 Bottom – 0.72. See Figure 9.
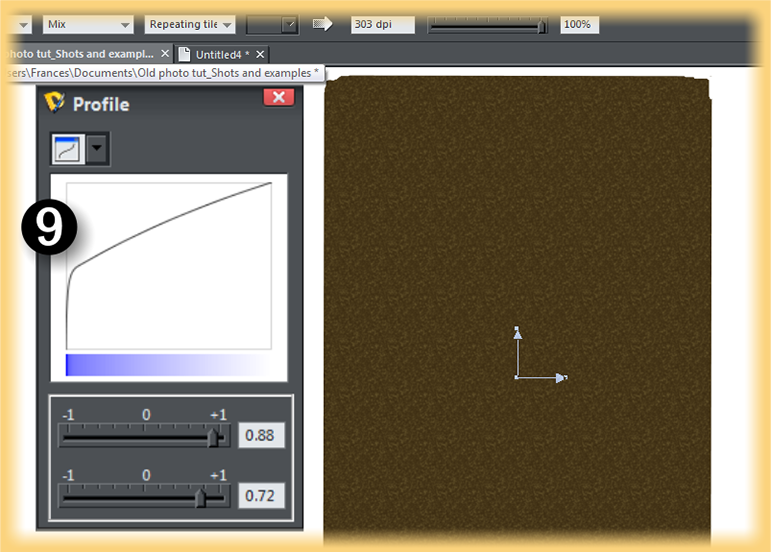
Figure 9
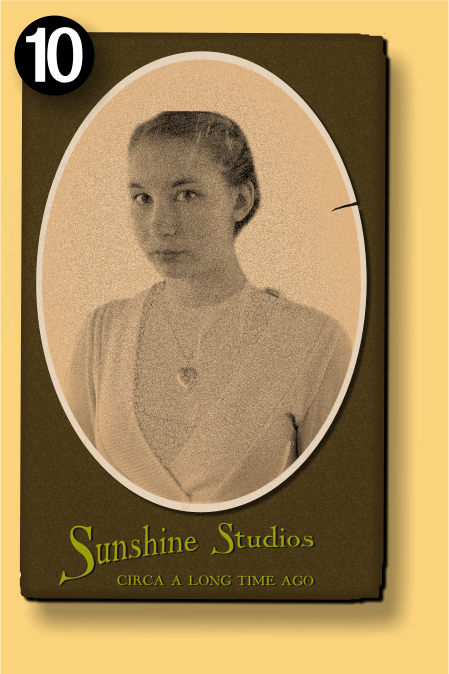
Figure 10
We are almost done. The last bit to do is the Studio label. For that you will need a suitable font. I found a nice free font that works well for this called Mayflower Antique by Dieter Steffman
The label is really simple. Type out your text in the antique font. You can have some fun and get creative with your studio name, I called mine Sunshine Studios after the name of the area I live in. I used a tag line “Circa a long time ago” and for contrast I used all caps for that.
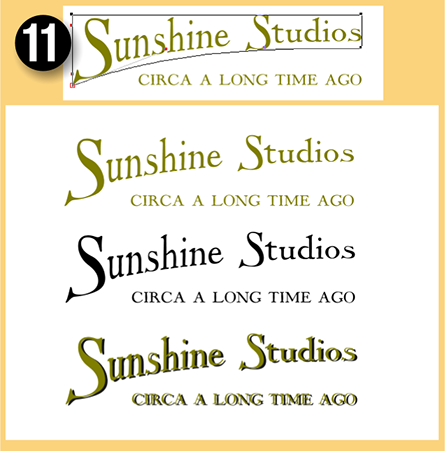
Figure 11
As you can see the label consists of two layers One is Medium dark yellow and under that is a black layer.
The label layers are offset a little, I know against a plain white background it looks a little like you’ve had one two many but once you place it on the card it looks much better! See Figure 11.
You could have some fun with this and become your own Grandpa! (or Grandma)
Enjoy!

(Angelize online), is the co-publisher of the weekly, Good Morning Sunshine! that has brought a smile to the faces of print and online subscribers for 14 years. She uses Xara products extensively in her work for her firm, SunWings Graphic Design. She loves to teach and share her love of Art though her YouTube channel, her contributions to The Xara Xone and and her work on Xara’s TalkGraphics forum as a moderator. You can drop her a line through her website or better yet stop by the Xara Xone forum on Talkgraphics and chat with Angelize there.
The tutorial Fabulous Fractals including the artwork and the downloadable examples file are Copyright © 2012 Frances Proctor. All Rights Reserved.


