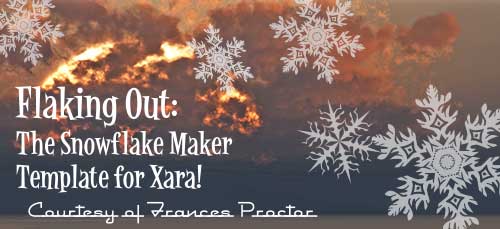
Snowflake Maker Template
by Frances Proctor (Angleize online)
With the special Xara Designer snowflake maker template I’ve created for this months’ XaraXone.com Giveaway, and Xara’s tools like Live Copy, you can easily make a whole snow drift of snowflakes for your holiday cards, publications or even for your living room windows. Kick it off by downloading the template by clicking on the download button, then skate on down to the steps and I’ll guide you through.
Install the Snowflake Maker as a Template
- Open the snowflake_maker.xar file
- Go to file> Save Template, and name your template
- Click Save.
To Use the Snowflake Maker
There are two methods to edit the template and create your snowflake. The snowflake maker uses the Live Copy function to create a six sided snowflake. Remember the paper snowflakes you made as a child by folding paper and cutting out pieces with scissors? The principle of this is just the same. One thing to note the live copy is a special kind of group and as such you will need to make sure that you are editing the basic shape within the group and not the group it’s self. The template consists of 13 triangles (all live copies) One is the master copy this is the one you will edit, the other 12 make up the octagon shape, these will become your snowflake.
Eraser Method:
- Right click the master copy and choose Open Live Copy As the Live Copy is a type of group you need to be sure you are using the Eraser on the shape inside at all times or the Eraser tool will produce Opacity Masks and you won’t be able to finish off the snowflake.
- You will now be working in an Edit inside window. Use the Eraser tool and cut your master shape as desired. It works the same way as cutting folded paper snowflakes. The left side of the triangle is the fold and cutouts on the fold will produce holes in the flake. The right side is the edges and cuts along this side will affect the flakes shape.
- You can also add to the flake by holding shift which switches from the Eraser toolto the Shape Painter tool.
Shape Tool Method:
- Either Ctrl + Click or right click the master copy and open the Live Copy. (note: I don’t recomend the Ctrl+Click method when editing with the Eraser because it’s too easy to accidentally lose the inside selection with the Eraser tool and then you get Opacity Masks.)
- Make sure you have the shape inside the master copy selected and then use the Shape tool to add nodes and push and pull them in and out to create the flake shape. The process is the same as before just a different method of moving nodes.
Finishing Off the Flake:
- If you are using the Eraser tool method, with the shape still selected in the edit inside window select the Shape tool and Click and drag to marquee select all the nodes. You will see there are likely quite a lot of them. On the Infobar you will see a little slider come active. This is the smoothing slider slide it to the right to increase the smoothing and reduce the amount of nodes.
- Deselect the shape and Ctrl + s to save and return to the main document and admire your beautiful snowflake! But don’t admire too long because you aren’t quite done yet.
- Marque select the 12 Live Copies that make up your snowflake (Make sure the master copy is not selected!) and right click. From the context menu that pops up select Stop updating your Xara program will ask you if you want to Stop all copies from updating or just this copy. You want to select Just this copy then the 12 Live Copies will be converted to shapes. This is why you don’t want the Eraser tool to produce Opacity masks. When updating is stopped Live Copies that contain Opacity masks become Opacity mask groups and they make the finished flake complicated to edit.
- With the 12 shapes selected Combine shapes >Add shapes or Ctrl +1 will create a single shape. You can now easily change the colour add an outline etc.
Saving your flake and resetting the template
- Export your flake choose from the menu File >Export and in the dropdown list choose to export as a Xara document and name your file. Click Export button and in the Native Format Options box that pops up choose Selection. I keep a folder for my snowflakes and export into that.
- Simply use undo to go back to the beginning and start over to create a new flake. Your exported flake will remain safe where ever you exported it to.
Discuss this giveaway in the Xara Xone forum on TalkGraphics.com
Have fun with your new flak-making skills, print some and decorate your livingroom window with them, and remember that no two snowflakes are dressed alike, because they hate it when they see a snowflake dressed exactly like them, and they bought theirs at 50% after the Holidays.
Discussion and support for this tutorial can be found on TalkGraphics.com in the XaraXone forum Go on over and show us your snow.
All Contents Copyright © 2013 Frances Proctor. All Rights Reserved. These files and any associated materials may not be redistributed without permission.
(Angelize online), is the co-publisher of the weekly, Good Morning Sunshine! that has brought a smile to the faces of print and online subscribers for 14 years. She uses Xara products extensively in her work for her firm, SunWings Graphic Design. She loves to teach and share her love of Art though her YouTube channel, her contributions to The Xara Xone and her work on Xara’s TalkGraphics forum as a moderator. You can drop her a line through her website or better yet stop by the Xara Xone forum on Talkgraphics and chat with Angelize there.


